

1. Open the correct case
Open the case, confirm the client and Case-owning firm, then select Accounting in the case navigation. “Case” and “matter” mean the same thing in these guides. There are two places to work:
If the case or Accounting section is missing, ask your administrator to check your role and case access.
2. Record one vendor bill
Example: a records vendor has billed the demo case $125 for medical-record copies, dated November 2, 2026, reference TRAINING-125-01. The vendor has not been paid. An expense records the individual case cost. A vendor invoice groups the charges on the vendor’s bill. In this example, the invoice links to the same expense—you enter the cost once.- In the case’s Accounting → Case Expenses → All Expenses, look for the vendor, amount, and reference. Open the existing expense if it is already there.
- Otherwise, select Add Expense. Choose the demo vendor, Record Request, 125.00, and November 2, 2026. Enter Demo medical-records copy fee and put TRAINING-125-01 in Invoice #. Enter the due date if the bill provides one.
- Leave it unpaid. If funding is undecided, leave it undecided for Accounting to resolve.
- Select Add Case Expense, then reopen the expense and compare it with the bill.
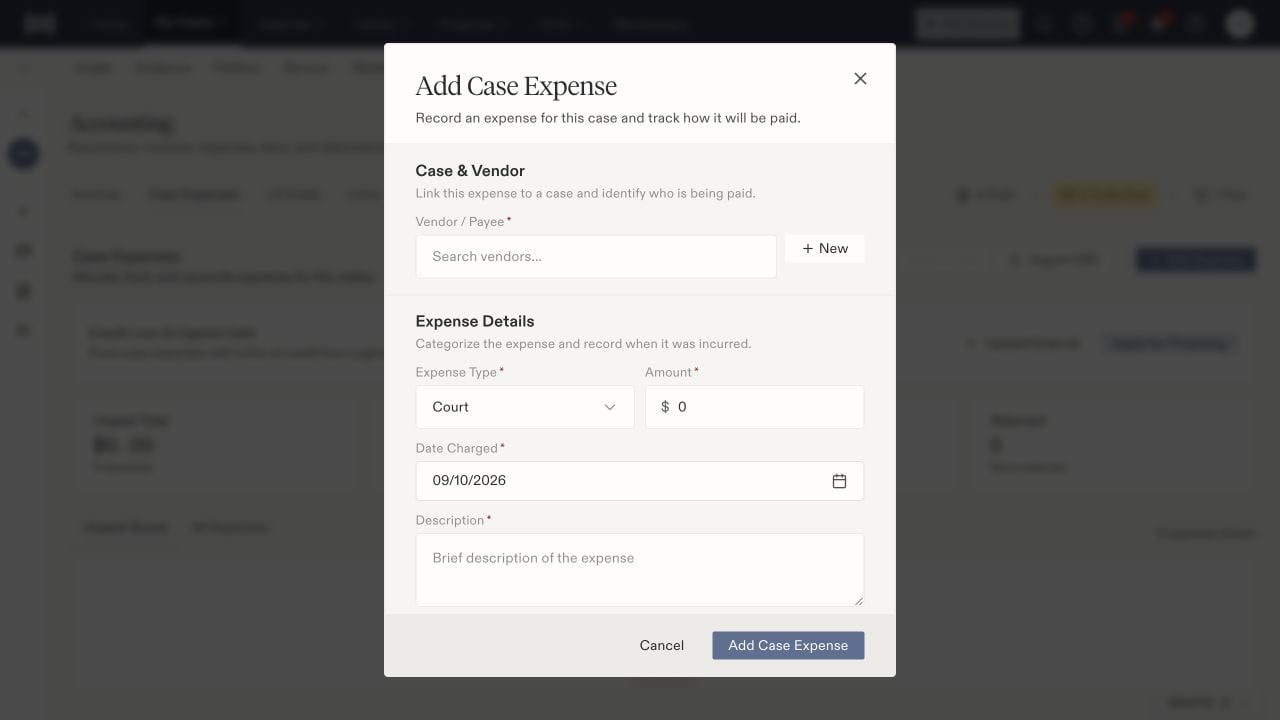
Find Vendor / Payee and Expense Details in Add Case Expense. This is a layout example; use the $125 Record Request values above, not the defaults pictured.
3. Hand the invoice to its reviewer
With an enabled invoice-review automation, creating a matching invoice sends it to the designated reviewer. That person opens Approvals, checks the source bill, and records the decision. You can finish your entry without approving it yourself. What you should see next: approval can stage the invoice as To Be Paid. That means it is ready for the payment process; the vendor has not necessarily been paid. Accounting resolves undecided funding and records payment separately. If the reviewer cannot find a request, give the automation administrator the invoice ID, office, and creation time. They can check missing approvals. Creating another invoice is not a retry.4. Prepare resolution terms
A resolution records the settlement or recurring-payment agreement. A check records money actually received under it.- Open the case’s Accounting → Resolutions → Add Resolution.
- Choose the resolution type and enter the amount, dates, payor, and fee/referral terms from the approved agreement.
- Save the draft and reopen it to compare the terms. If you have accounting permissions and see Initial status, choose Draft for this handoff exercise.
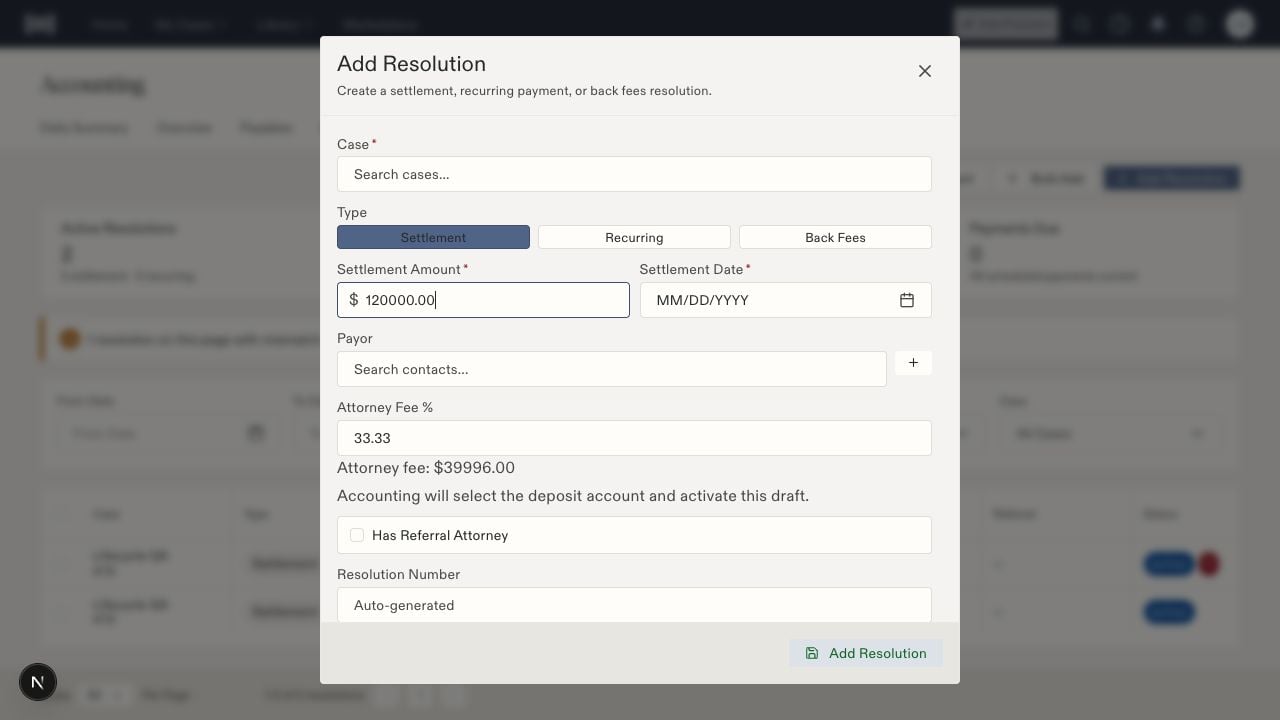
Legal staff enter the terms here. The message beneath the fee calculation explains that Accounting selects the deposit account and activates the draft. These amounts illustrate the form, not your firm's fee policy.
5. Check the incoming payment and allocation
If you log receipts, follow the incoming receipt steps. Otherwise, pass the receipt evidence to Accounting. On the saved check, compare Date Received with when the firm received it and Deposit Date with the actual deposit. For recurring payments, Period Start and Period End describe the period the payment covers. An allocation assigns part of the receipt to a purpose or recipient. In this fictional example, $1,000 is split between a $125 expense and $875 client recovery: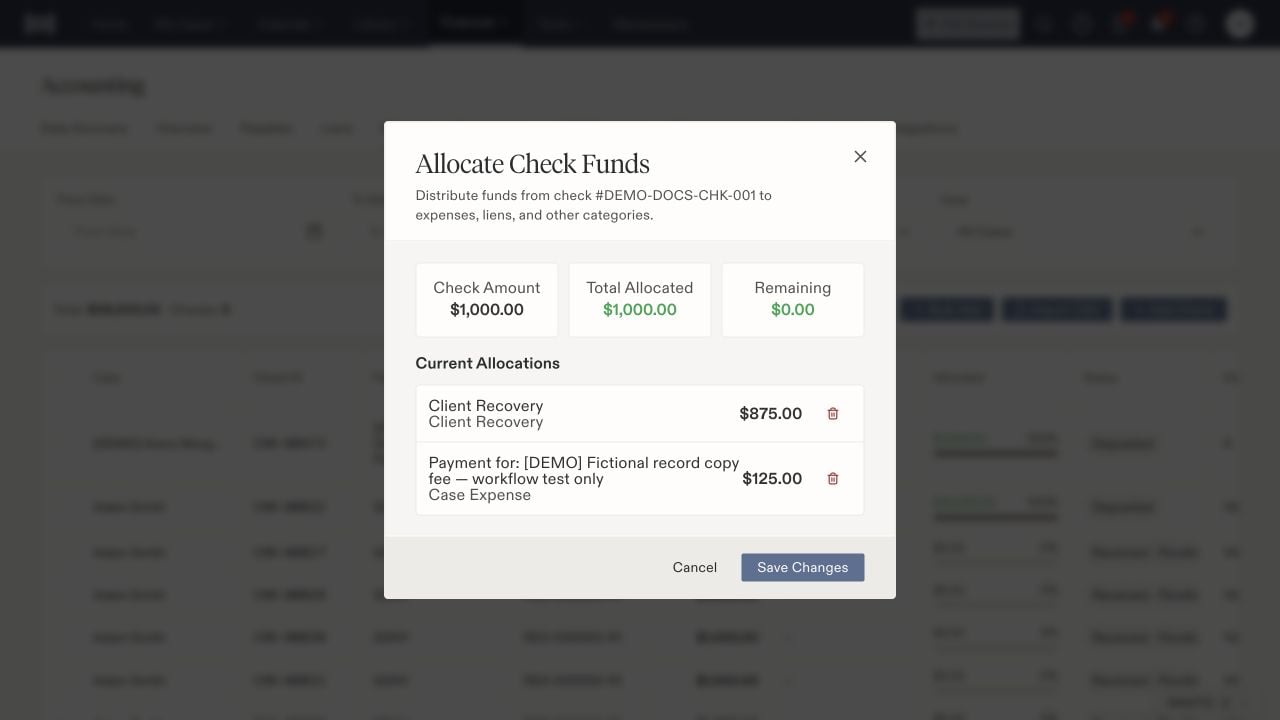
Check Amount and Total Allocated both equal $1,000, and Remaining is $0. This confirms the whole receipt is assigned. It does not confirm the recipients have been paid.
6. Find the record again using its ID
Open the expense and find Record IDs & QuickBooks. Copy the full Expense ID when asking about that cost. For a receipt, open the check for editing and copy its stored Check ID.
An expense can exist in Presolve without a QuickBooks link. Ask Accounting to check its export result; do not record another payment to get a link. See IDs and QuickBooks reference sync.