

Create the task
- Select Create Task. In a combined drawer, select Task.
- Choose a Task Type and enter a specific Task Title, such as “Review the accident report.”
- Select Add Details to enter instructions and review the remaining fields.
- Check the due date, time, priority, case, and Assigned To. Select the responsible person explicitly; a blank-looking picker can default to the current user when saved.
- Review followers, reminders, and Notify Client before saving. These are separate from the task’s title and status.
- Select Create Task, then locate the saved row and verify the assignee, type, case, and due date.
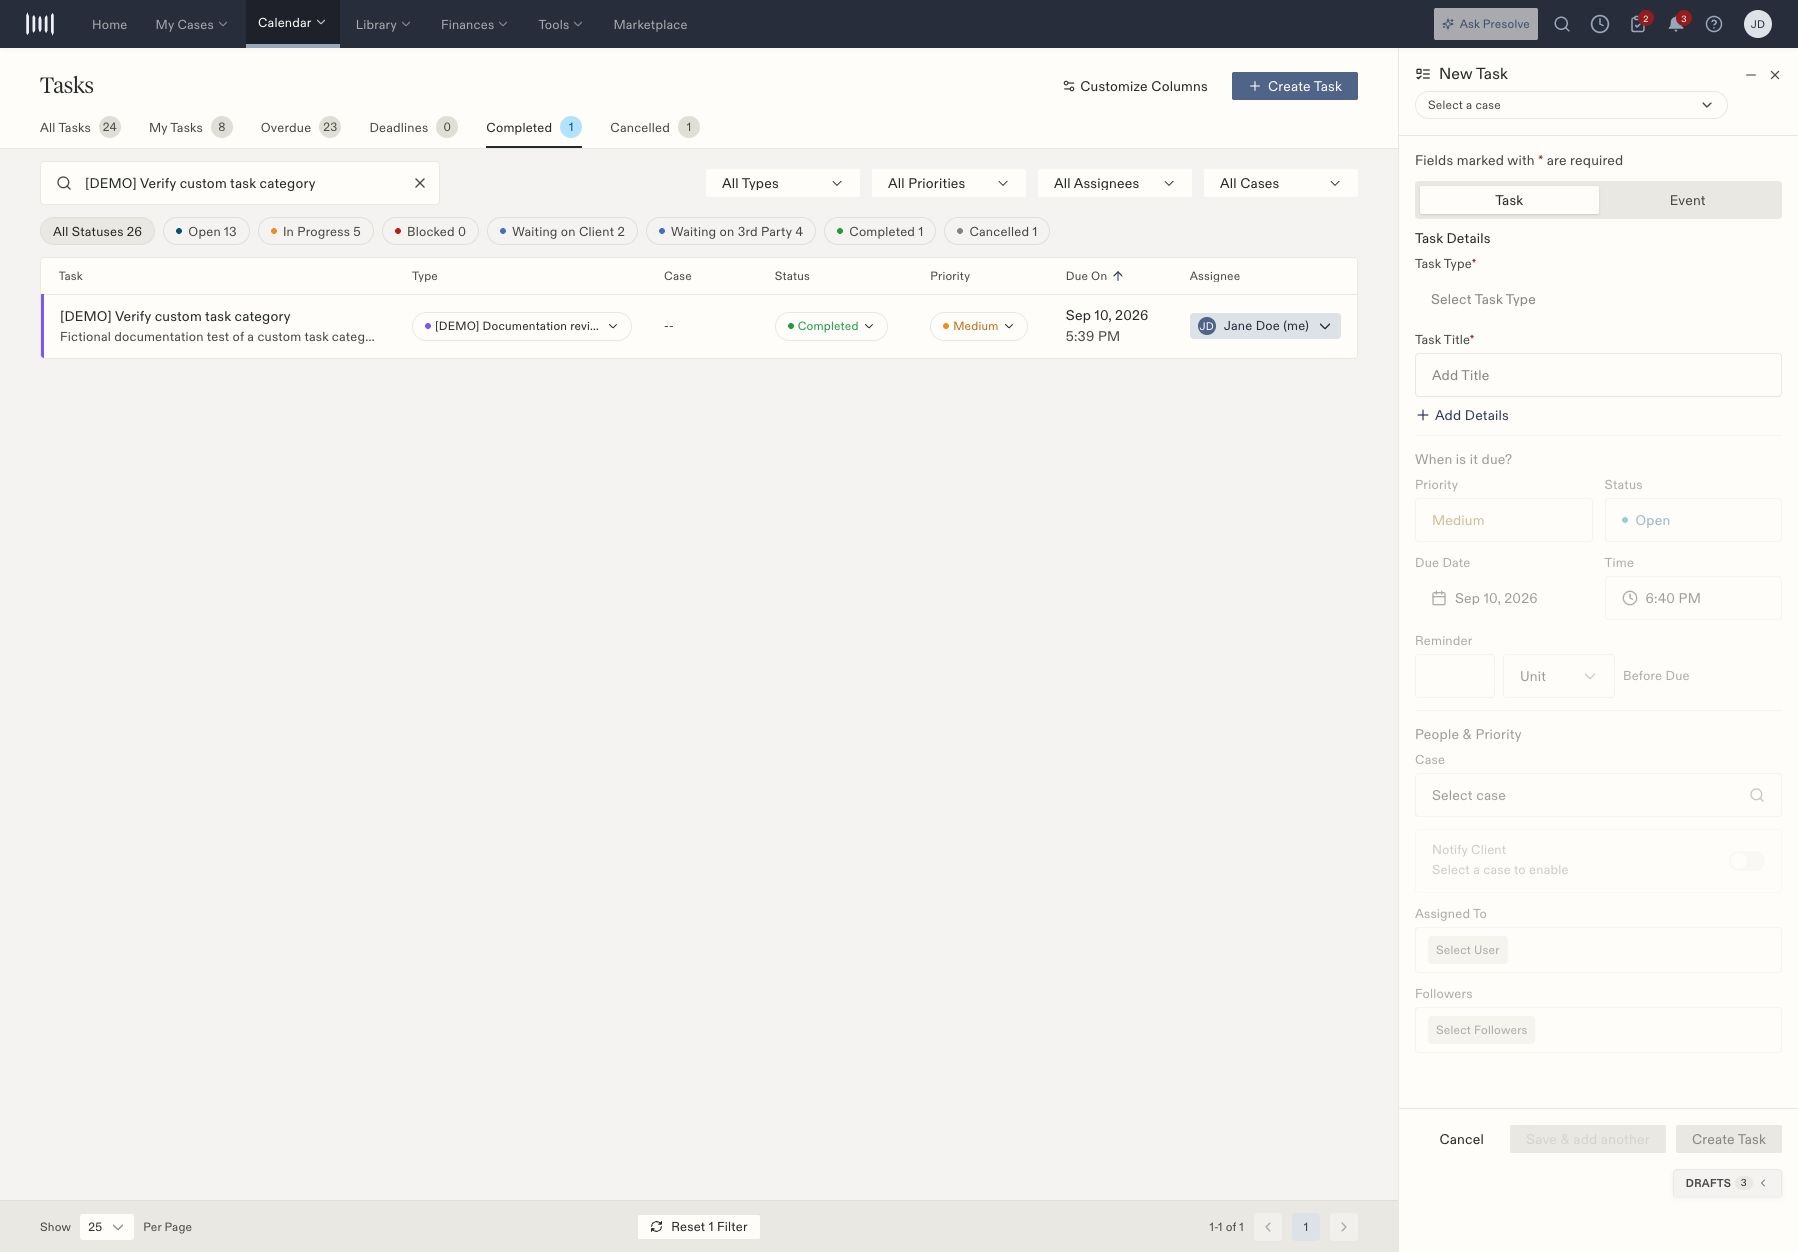
The task drawer shows type, title, scheduling, assignment, and optional notification controls.
Find the task later
Choose All Tasks, My Tasks, Overdue, or Deadlines as appropriate. Search the title and check type, priority, assignee, case, and status filters. A badge total and the filtered table can represent different sets of tasks. The row controls let you review or change the type, status, priority, and assignee where your access permits. Confirm the case and title before changing a row.When a task seems to disappear
Check Completed and Cancelled and clear search or filters that no longer apply. Completing a task moves it out of active views. Follow Complete, reopen, or cancel a task for the status sequence. Your administrator can configure task types.Understand the task fields
Attach Document is available after expanding details. Check the selected document and case before saving. For a single task, use Create Task; Save & add another is also available when entering several tasks.