Open the matter and select Send Email. Check the case name and number in the New Email drawer. You can start from a template or write an ad hoc message.

Prepare the message

  1. Choose the Category, then select a Template or leave Start from blank selected.
  2. Review From. Automatic delivery prefers the sender’s connected mailbox. Replies to Outlook or Gmail messages return to that mailbox; firm mail uses the configured From address and reply-to settings.
  3. Check To and Cc. Templates can prefill Cc, and additional addresses can be separated by commas.
  4. Enter the Subject and Body. Use Insert variable for available case values.
  5. Use Attach files for supporting documents. The composer lists limits of 10 documents, 10 MB per file, and 20 MB total.
  6. Select Preview and inspect the message before sending.
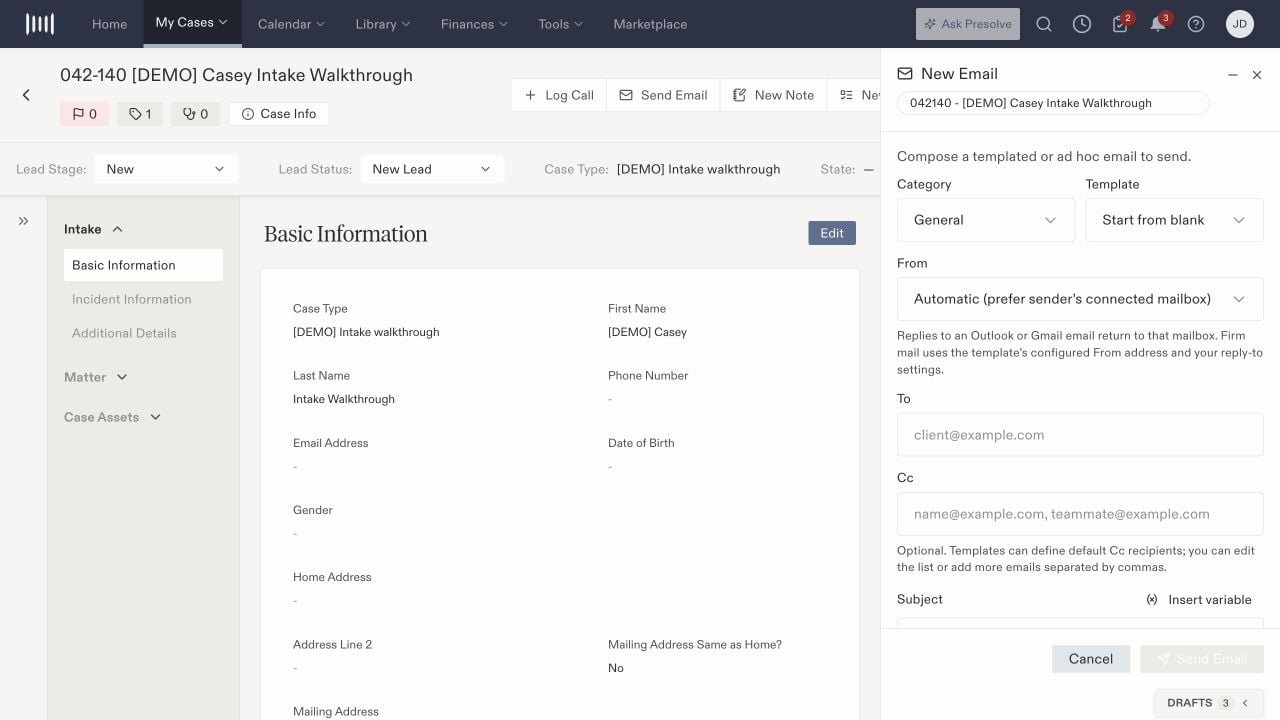
New Email drawer showing category, blank template selection, sending mailbox, To, Cc, and Subject fields.

The email drawer separates template choice, sending mailbox, and recipients.

Check the populated message

Confirm that the client’s name, dates, amounts, and other variables match the intended case. Replace missing values before sending. Review every attachment and the entire Cc list, including addresses supplied by a template. Select Send Email when the message is ready for those recipients. Wait for the result and inspect the case’s email history. If sending reports a problem, check the history and mailbox state before retrying to avoid sending a duplicate. A saved draft or selected template does not establish delivery.

Return to an unfinished email

The drawer offers Minimize drawer for returning to other case work. Use the Drafts tray to locate unfinished items and check their associated case before continuing. Cancel can prompt to discard the draft; confirm only if you do not need it. Administrators maintain reusable content in Email Templates. For connection setup, see email integrations. For an internal record without a client message, save a case note.