

Upload a template
- Select Upload Template.
- Choose a PDF, DOC, or DOCX file within the displayed 10 MB limit.
- Enter a recognizable Template name.
- Choose the correct Document type. This controls where it appears in the Send eSign document picker.
- Select Upload & Create and wait for the result.
- Use Refresh and find the template by name if the list has not updated.
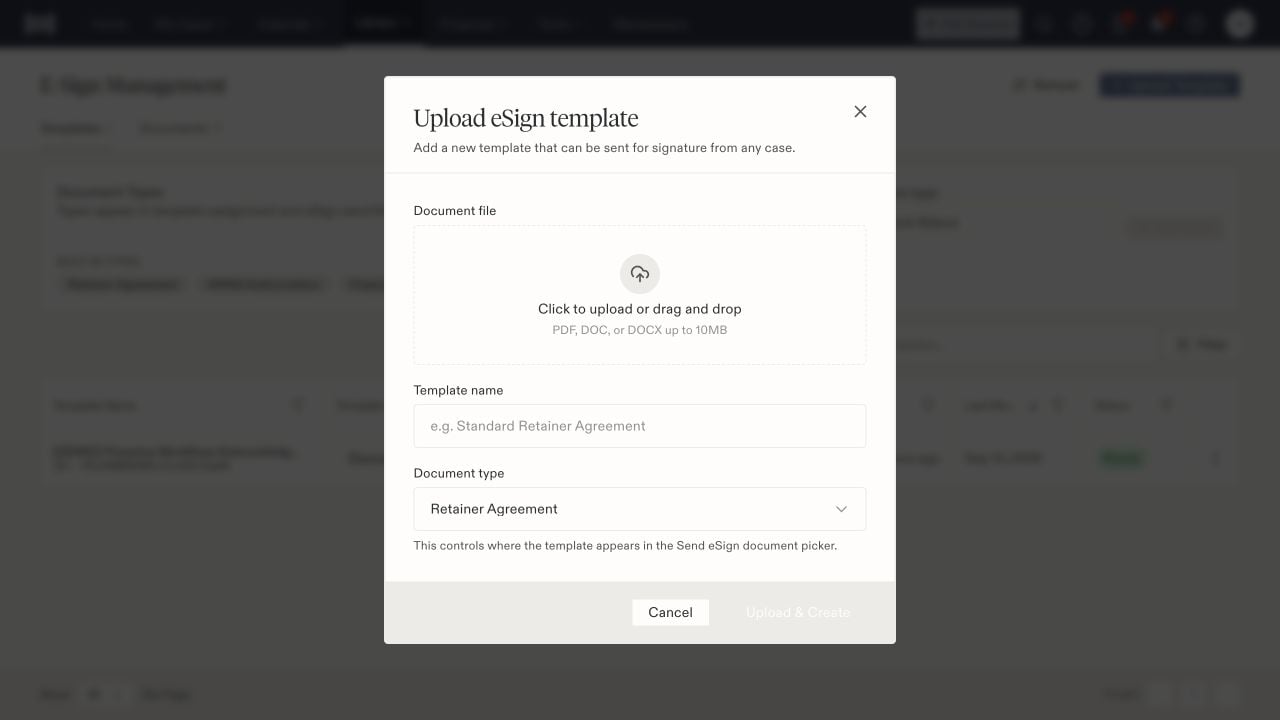
Uploading a template requires a file, name, and document type.
Prepare recipient fields
Open the template’s actions menu and select Edit. The editor page is labeled Retainer Editor, including when you are editing another document type. Confirm the document content before placing fields. Add the fields the recipient needs, such as text, signature, and date. Assign each field to the intended recipient role, position it beside the relevant label, and inspect every page. Avoid leaving required fields over unrelated text or outside the visible document. Use Done Editing to return after editing. Reopen the template and verify that field placement and recipient assignments persisted. The library’s Ready label does not replace this check.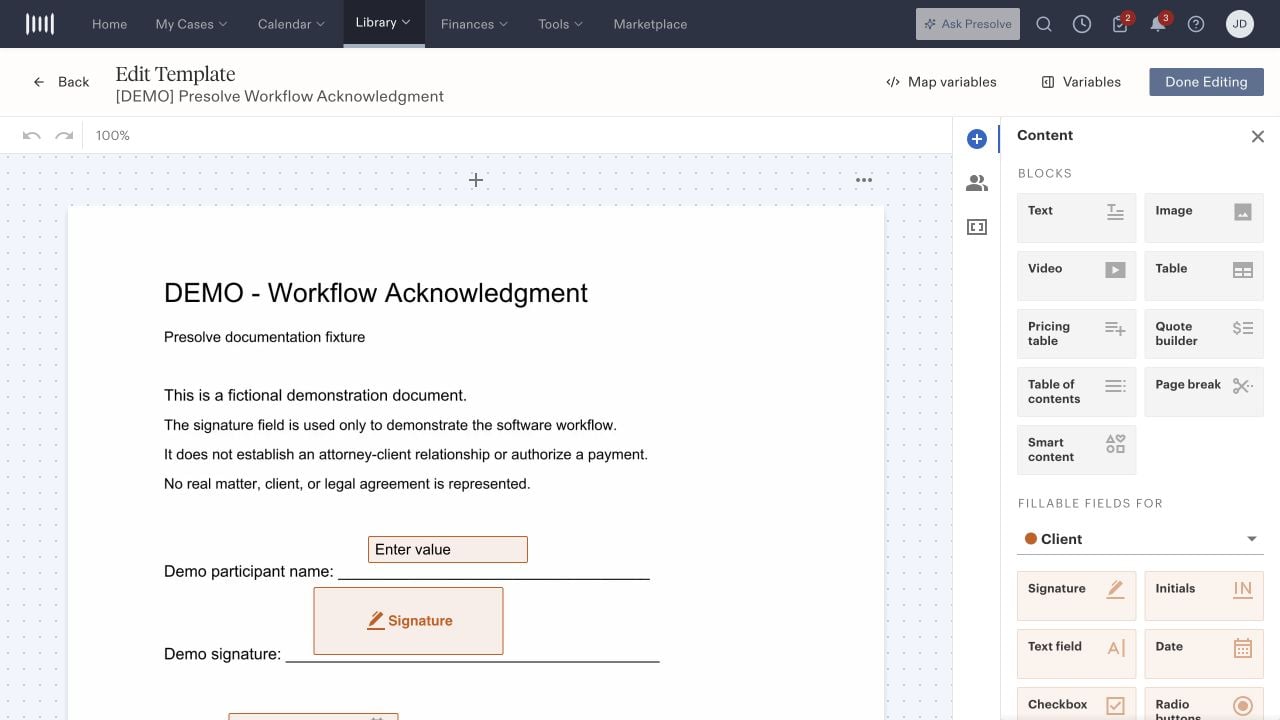
The fictional template has recipient text, signature, and date fields.
Use variables and intake answers
Variables provides copyable tokens grouped by information such as client, attorney, case, document, vehicle, referral, and NSA provider. Use the relevant group for the template’s purpose. Map variables pairs a custom token with an intake accessor—the saved field name for an intake answer. The screen also describes automatic population for matching[Intake.<accessor>] tokens. Ask the intake administrator for the correct field name if it is unclear. Check the populated document on the intended case before sending; a configured mapping does not guarantee that a case contains the answer.
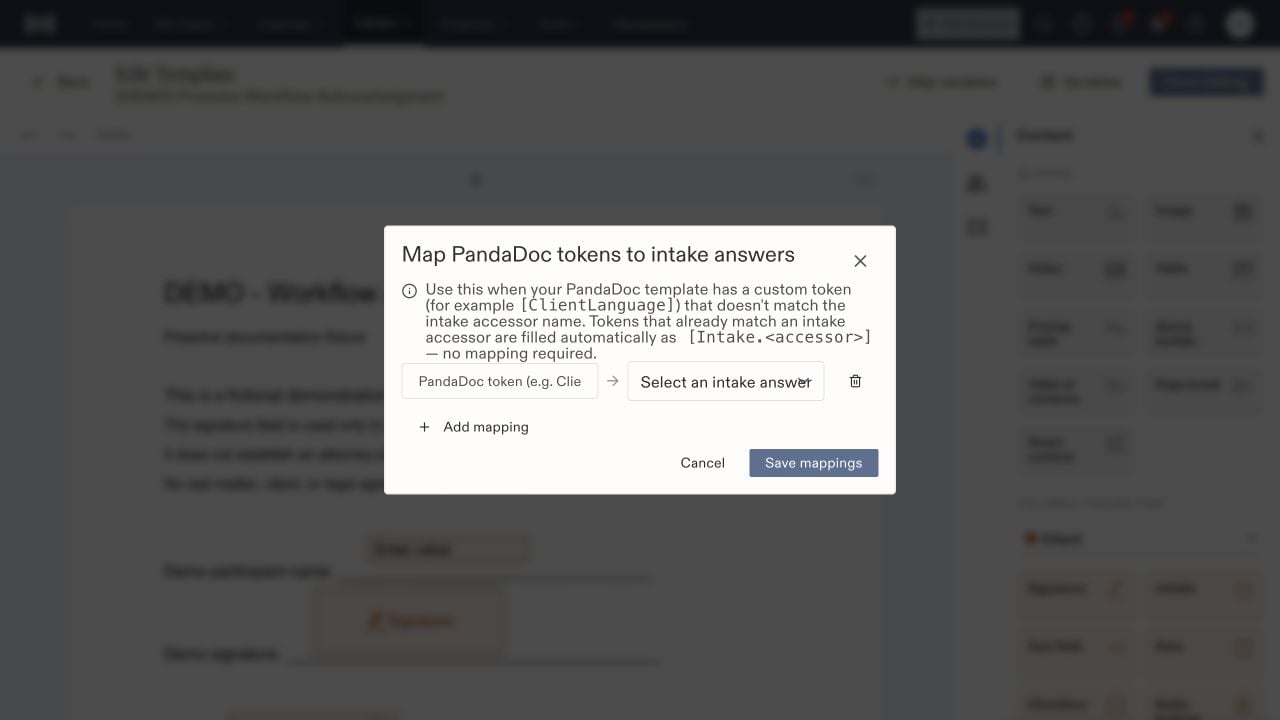
A custom document token can be mapped to an intake answer.