

What staff should check first
Paralegals: record the source bill and correct case. If you are only logging an expense, you do not need to choose a QuickBooks payment route. Hand payment and mapping decisions to accounting. Accounting: before exporting, confirm the office, vendor, amount, and payment account. Afterward, verify the linked transaction below. HQ or the integration administrator connects the company and maintains child-office mappings. Saving an expense, logging an incoming check, approving a review, and exporting a payment are separate actions. Paid in Presolve is not proof of a successful QuickBooks export. If required child-office mappings are missing, the export is blocked; the local record does not become a QuickBooks transaction under a generic or guessed account.Connect the right company
- Open Settings → Integrations → QuickBooks Online.
- Use Connect QuickBooks Online, sign in with an authorized Intuit account, and select the intended company.
- Return to Presolve and confirm the connection and company before configuring accounts.
- Select Company accounts. Choose the default expense and payment accounts from the searchable list, plus a credit-card account if used. The account type and ID help distinguish similar names. Select Save Online settings.
- Use Office accounts and Vendor matches to finish setup, then Open Payables to process work. A connected badge confirms authorization; it does not mean every account and vendor is ready.
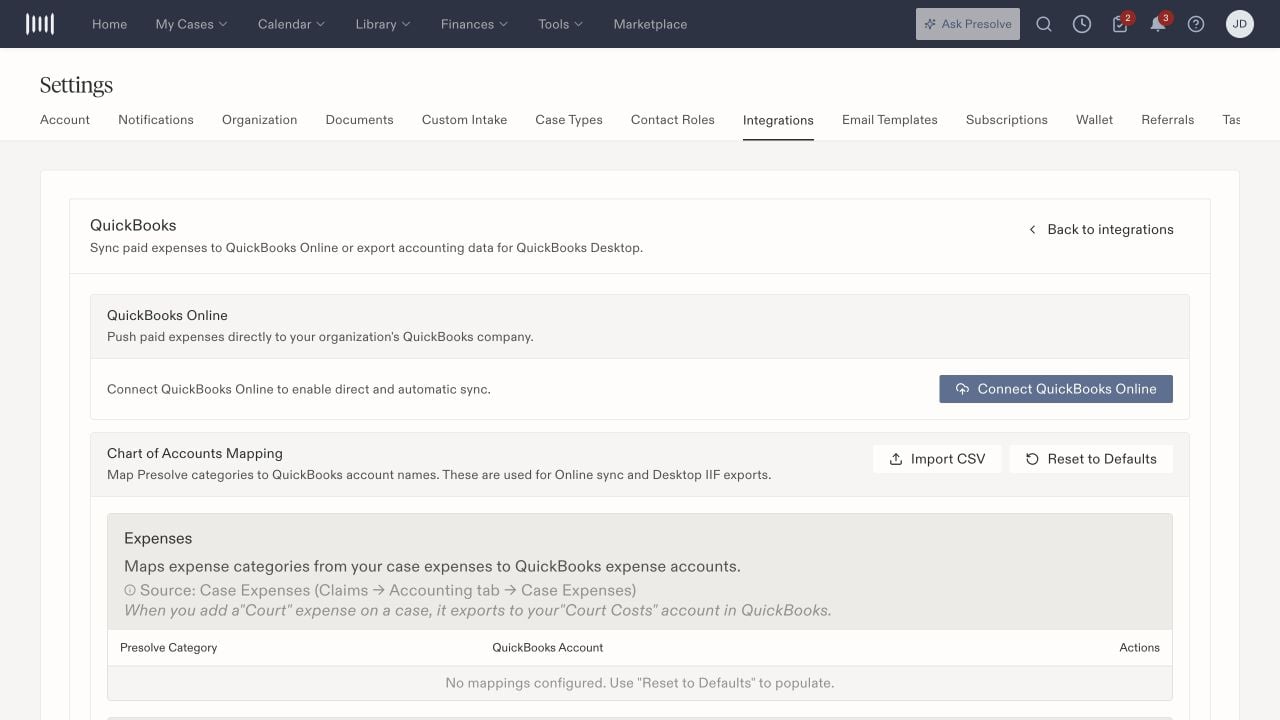
Existing demo setup screen, before connecting. Connected mapping controls may differ after the accounting update.
Choose accounts once and reuse them
Select an account from QuickBooks rather than typing its name. New selections save the account ID, so a later QuickBooks rename keeps the link. Saving existing defaults also keeps their IDs when each name uniquely matches an available account. If a previous account is unavailable, choose a valid replacement before saving. Use Category overrides only when the company’s own expenses need different accounts by category. For example, Court costs can use a separate account while other costs use the default. The order is:- A child office’s assigned cost account, for that office’s expenses.
- An explicit category override for the connection owner’s expenses.
- An existing legacy category-name mapping, if it resolves.
- The company default expense account.
Map each child office
From HQ, open Suboffice QuickBooks accounts. Search for a firm or use Setup needed only.- Confirm the client-facing firm name. Set an optional Internal office label here or in the HQ directory to distinguish suboffices. This label appears in the HQ directory, office selector, and QuickBooks setup; it does not change the firm name used in emails, e-sign messages, or document variables. Clear the label to show the firm name again.
- Choose Cost / expense account and Payment / check account from the connected HQ company’s accounts.
- Choose the optional Credit-card account when applicable.
- Select the Resolution deposit accounts that this child office is allowed to use. Leaving this selection empty exposes no inherited HQ QuickBooks deposit accounts.
- Review Payment routing rules. Choose a funding source, payment method, and compatible QuickBooks account, then select Add rule. An account selected while paying a particular item overrides these defaults.
- Select Save suboffice account mappings, then reopen and verify the choices.
Map vendors without creating duplicates
Open Vendor Review. Search for the Presolve contact and review QuickBooks candidates. Confirm the intended existing vendor after checking its identity and active status. Search alternate names before creating a new vendor. Creating and linking a vendor writes a new vendor to the connected QuickBooks company. If search fails: use Retry vendor search. A failed search does not mean the vendor is missing; creating a new vendor is unavailable until the search succeeds. A failed contact list has its own Retry vendor list button. Review ambiguous matches with accounting. Similar names alone are not enough, especially when offices use the same vendors. For company-side vendor maintenance, use Intuit’s vendor guide.Preview the destination before confirming payment
In Mark paid or Export and mark paid, choose the funding source and payment method. The dialog loads the saved QuickBooks handling and resolves the payment account automatically. You do not need to select the same account again for each payment. Read the office, QuickBooks company ID, payment account, and the line showing where that choice came from: a selection, routing rule, office default, or company default. Expense coding is shown separately. If an account is missing or incompatible, select an available account or have the administrator correct setup. Account setup opens in another tab so the payment form stays open. After correcting mappings, return and use Recheck setup; your entered funding source, method, and reference remain. If setup cannot be checked, retry or deliberately choose Record without QuickBooks. Confirmation waits for setup to finish so a slow connection cannot silently change the payment route. Recording payment does not transfer money. After confirming, check the result and linked transaction as described below.Know what is sent
Several Presolve expenses can belong to the same QuickBooks payment. Local expense IDs, local check IDs, QuickBooks transaction IDs, and printed check numbers are different identifiers. A payment reference is not a permanent transaction ID.
Do not create a separate Check/Expense to pay a Bill that already exists. See Intuit’s Bill versus Check/Expense explanation.
Identify the record before making a correction
Example: two expenses, one QuickBooks payment
In this illustrative example, two expenses link to one QuickBooks payment. Each expense keeps its own Presolve ID. Use the Expense ID to discuss one charge. Use the QuickBooks type, ID, and company to identify the shared payment. Correcting that payment’s reference affects the shared transaction. For example, a source check number 1042 is not enough to identify a receipt or expense. Send your accounting owner the office, client/case, full Presolve ID, and—if shown—the QuickBooks type, ID, and company. Confirm the client on the record before changing it. A linked expense payment and an incoming resolution check are different records. The expense’s sync controls below do not establish two-way synchronization for every inbound check.Verify and refresh the linked payment
- Open the expense and find Record IDs & QuickBooks.
- Note the Expense ID, Check / payment reference, QuickBooks entity type and ID, connected company ID, last-sync time, and any error.
- If no transaction is linked or sync needs attention, use Account setup or Vendor matches to open the relevant settings without closing the expense. Follow the QuickBooks transaction link when offered. Confirm you are in the matching company, then compare the vendor, amount, and account.
- To send an edited local payment reference, save the expense first, then select Sync saved payment reference.
- To read the check number from the existing linked QuickBooks payment, select Refresh check number from QuickBooks. A nonblank external reference can refresh the local value. If QuickBooks has a blank reference, this explicit refresh keeps the local value and records the current QuickBooks version. Review the linked payment before retrying Sync saved payment reference after a conflict.
- Read the result and reopen the record to verify it. Reconnect in integration settings if prompted.
Understand the result before retrying
Changing the payment reference on a shared QuickBooks payment affects that payment, not just an isolated expense. Coordinate the correction with accounting. Editing an amount, deleting a local record, or voiding a payment needs separate review; these reference buttons do not carry out those operations.