A medical chronology organizes medical encounters over time so your team can review treatment alongside its source evidence. Start from the case’s Matter → Medical page and select Chronologies. The medical page also offers Generate Medical Chronology and a link to the latest chronology when one exists. An auto-accident case is used in the example below. The workflow concerns medical evidence and is not limited to auto accidents; available matter sections depend on your firm’s case configuration.

Add the source records

  1. Open the correct case and confirm the client’s name.
  2. Expand Case Assets and select Documents.
  3. Select Upload Files and choose the medical records you want available on this case.
  4. Wait for the files to appear in the document list. Open the files to check that the pages are readable and belong to this client.
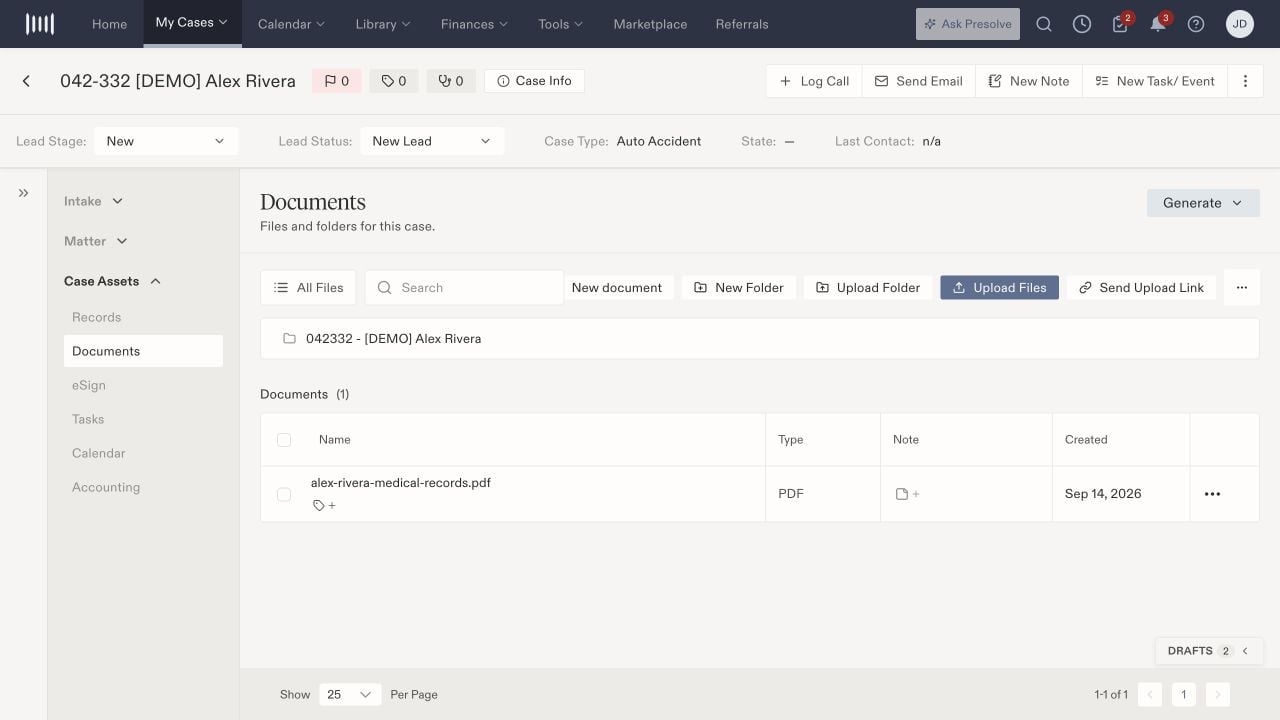
Alex Rivera demo case Documents page with Upload Files and the uploaded alex-rivera-medical-records.pdf source file.

A fictional case with a PDF containing emergency, imaging, and physical-therapy records.

Use descriptive file names so staff can distinguish a provider’s records, an imaging report, and a later supplemental production. Review for missing pages and duplicate copies before relying on the resulting chronology. Uploading a file and preparing its contents are separate steps. A file appearing in the case document list does not mean a chronology has finished generating.

Prepare sources

Return to Matter → Medical → Chronologies and check Overview. If Prepare sources appears, select it. The page reports that the request was accepted and checks progress automatically. Generate chronology becomes available once the sources are ready. Leave the page open while preparation continues, or return later and use Refresh chronologies to check again. If the page says no documents are available, return to the case’s Documents section and check the upload. If it cannot check the chronology status, refresh before submitting another preparation request. A status-check failure does not tell you that preparation has stopped or that no chronology exists.

Generate and find the result

When Generate chronology is available, select it and follow the generation workflow. Confirm that you are working on the intended case before starting the run. Return to the chronology’s Overview to check for a completed version. The page checks for completed versions automatically while open. A completed chronology shows its encounter, provider, and version information; View timeline opens the entries. Use Version history to choose an earlier result. Its options identify the generation time, entry count, and source status. Selecting an older version changes the version you are reviewing; it does not regenerate it.

Review treatment and evidence

  • Overview summarizes the selected chronology and its status.
  • Treatment Timeline shows the medical encounters in that version. Review the dates and supporting sources when interpreting an entry.
  • Documents provides Open medical source documents, which opens the case’s medical-analysis document view.
  • Evidence & review provides Medical evidence & review, which returns to medical analysis for the supporting medical information.
Compare important statements with the original records. For example, distinguish the date an imaging study was performed from the date the report was written, and distinguish a documented finding from a client’s reported symptom. See Review medical analysis views for the document filters and treatment views in that workspace.

Understand current and older versions

Completed · Current version means the version matches the source state checked by Presolve. Completed · Sources have changed, or a stale-version notice, means later source or review changes are not included in that result. Prepare the updated sources as needed and generate a new chronology to include the changes. A current source status does not replace professional review of the chronology’s content. The medical chronology’s Complete content action downloads its structured JSON content. It is useful when your team needs the complete underlying result; it is not a formatted Word or PDF export.

If preparation or generation cannot continue

Record the case number, the status shown, the source file names, and approximately when you started preparation or generation. Include whether you can still open the uploaded documents. Send that information through your firm’s support process rather than repeatedly starting the same request. See Prepare a useful support request.