

Build the form
- Select New Intake Set, enter its name and description, and select the intended case type.
- In the builder, choose Client, Incident, or Administrative.
- Use New Subsection to group related questions.
- Select Add question and choose its type, label, help text, and required setting.
- Save the question and verify its placement in the outline.
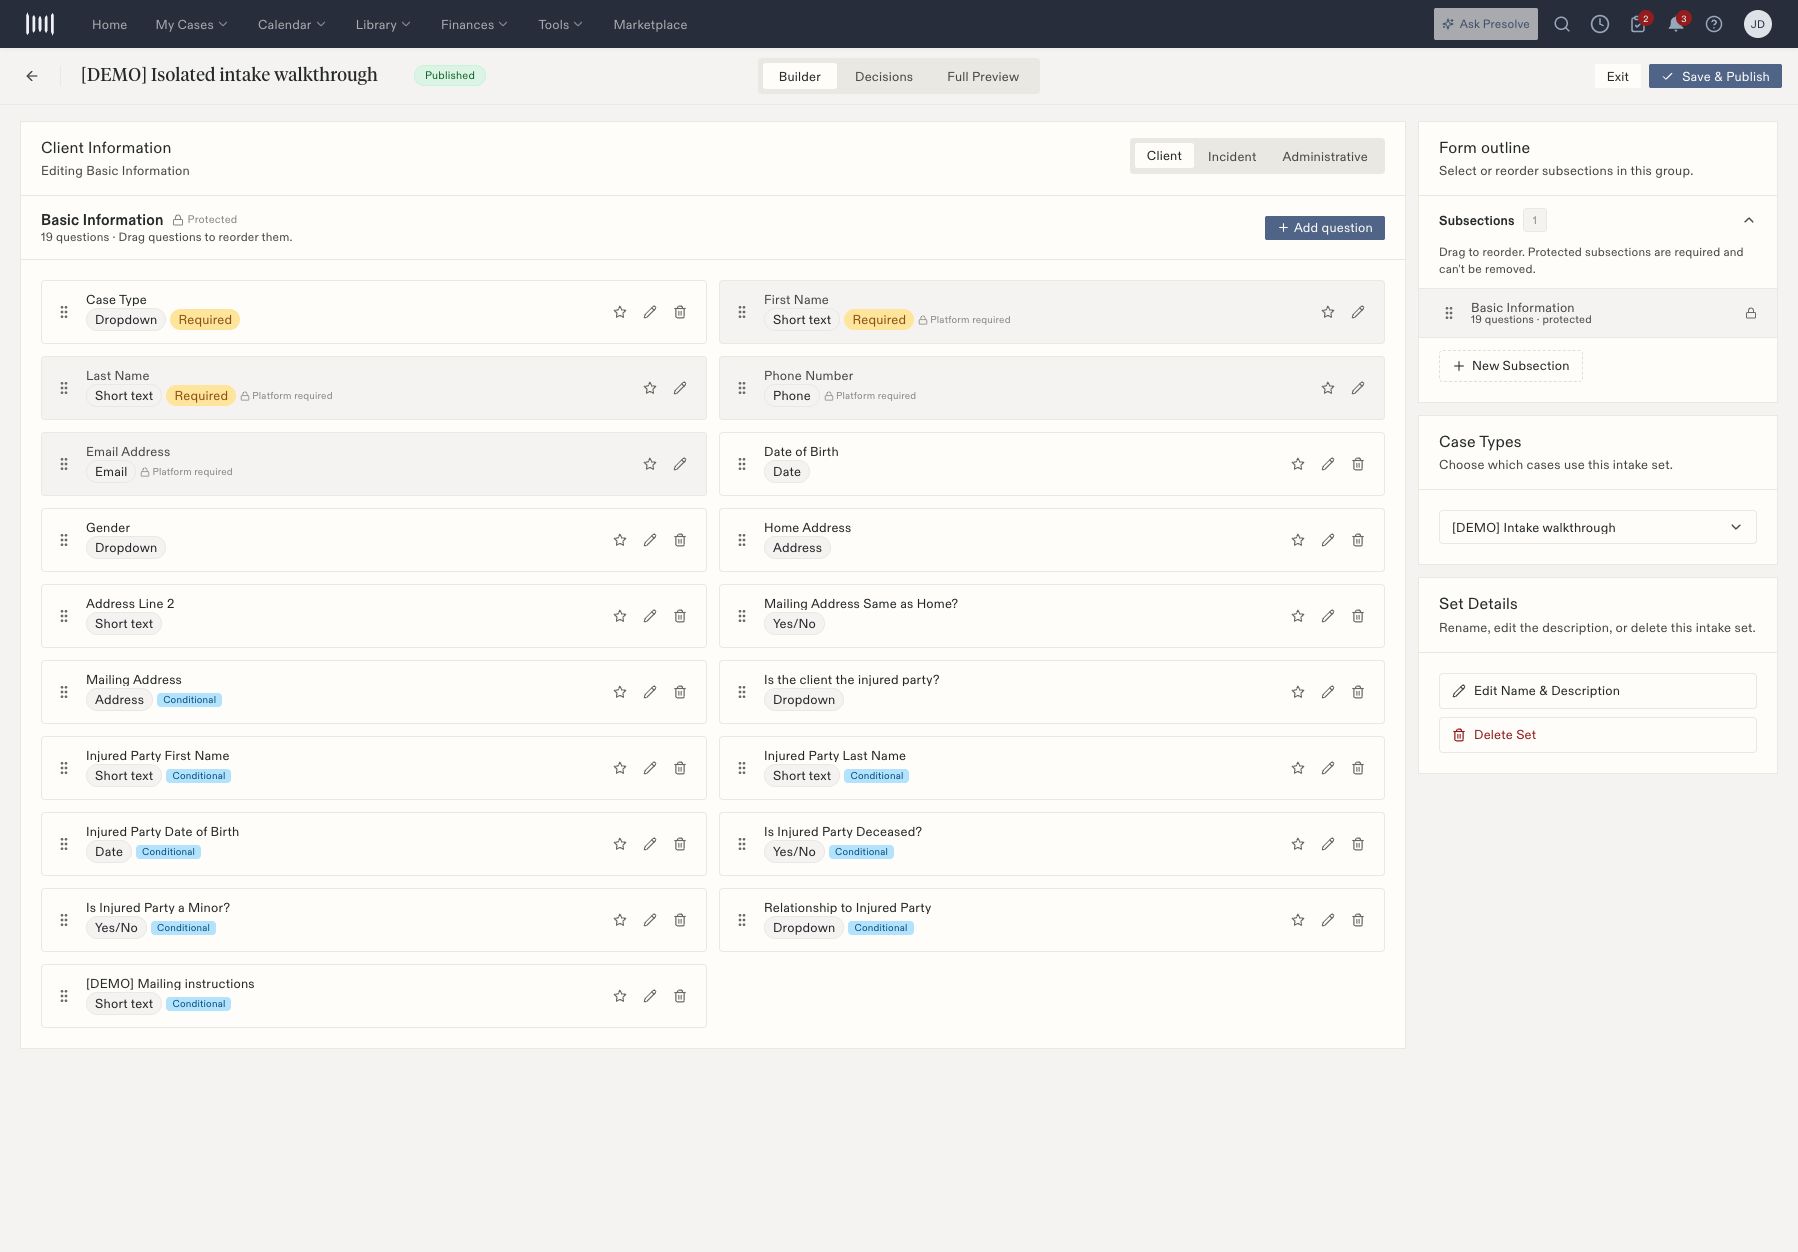
The published demo intake builder showing questions, protected fields, outline, and case-type assignment.
Publish to the right case types
- Review the form with Full Preview.
- Select Save & Publish.
- Inspect the case-type assignment in the confirmation dialog. Clear unintended selections.
- Select Publish and check the confirmation and published version.
- Create a test case of the assigned type through My Cases → Upload Case and confirm the intended form loads.
- Save the test case, then read its intake answers to verify persistence.
Choose a question type
The builder offers the following question types. Choose the type that fits the answer you need, then check its settings in the question editor.
Existing intake sections can also include protected identity and address questions. Review the editor’s protection indicators before planning changes to those fields.
Review question settings separately
Label is the text the person completing the intake reads. Help text explains what to enter, while Placeholder provides a hint inside the input. Use a plain-language label and put additional instructions in help text. Field Name is a unique organization-wide identifier generated from the label. It can be locked after creation. Check it before saving a new question and do not assume changing the visible wording will change the underlying identifier. Required controls whether the question must be answered. Conditional visibility controls when it appears. Optional answer rules control actions associated with answers. Review each setting independently.Organize and preview the intake
Use the Client, Incident, and Administrative areas and their subsections to keep related questions together. Place a controlling question before its dependent follow-up; the condition picker offers earlier questions. In Full Preview, inspect the order, subsection labels, question types, and Conditional indicators. Then test the actual answer interaction after assigning the intake to an appropriate test case type.Publish to the intended case types
Save & Publish opens a separate assignment review. Inspect the selected case types before selecting Publish: the assignment is used when creating or viewing cases of those types. For an isolated demonstration, create a dedicated case type and assign only that type. Verify the confirmation states the expected number of assignments and that the intake library shows the published version. An Attorney Only case type is described by the creation screen as hidden from admin/intake portals. An attorney-side test therefore does not establish what a public or client portal will show.Verify the saved case
- Open My Cases → Upload Case and select the assigned case type.
- Confirm the intended intake sections load.
- Exercise both answers of a conditional question.
- Enter a recognizable test answer and complete the intake.
- Review the final action: Save and Save & Send to RingCentral are distinct choices where offered.
- Open the created case and check that the saved answer appears in its intake information.