Open Accounting → Timekeeping. You can also open Log time entry from the clock icon in the top navigation.

Add a time entry

  1. Select Add Entry.
  2. Search for the correct Case and enter a descriptive Task Name.
  3. Set the date the work occurred and choose the appropriate Activity Type and Team Member.
  4. Review the required Client field.
  5. Enter Hours and Hourly Rate. Check the displayed hours × rate total.
  6. Review Billable to the client and add any useful notes.
  7. Select Add Time Entry and confirm the saved entry in Timekeeping.
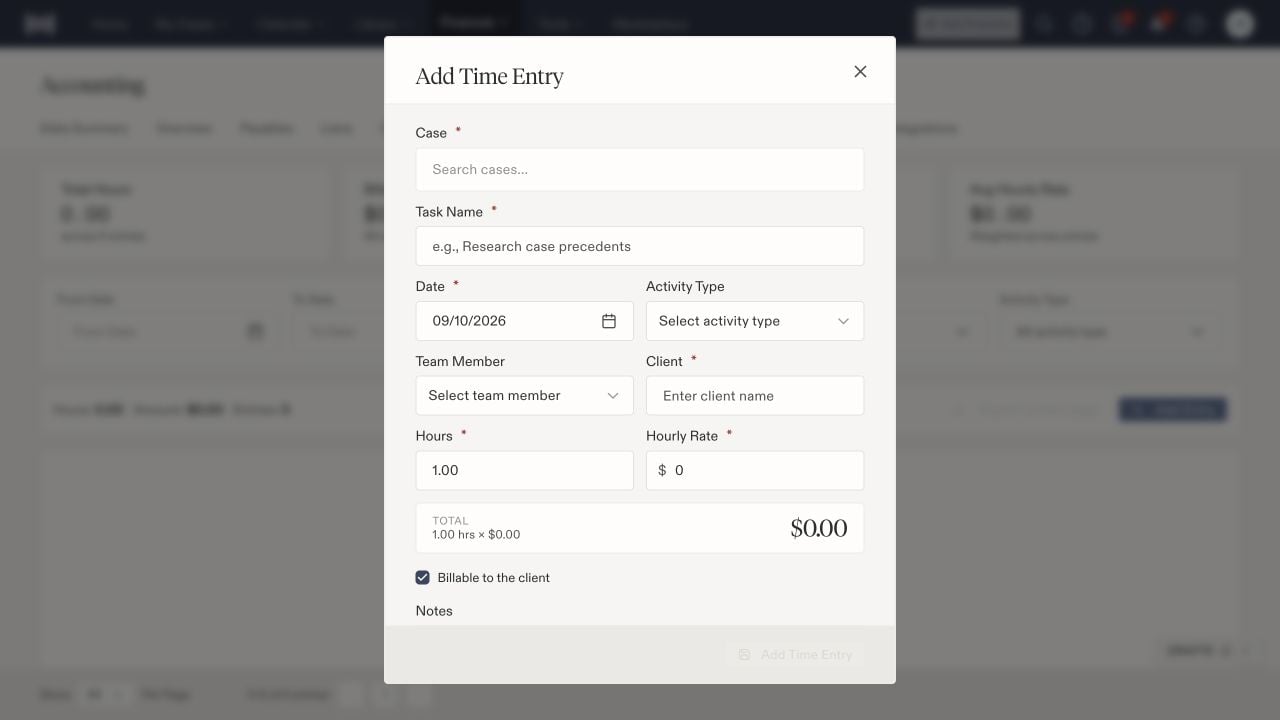
Add Time Entry dialog with case, task name, date, activity type, team member, client, hours, rate, and billable checkbox.

Time entries distinguish the work description, team member, hours, rate, and billable choice.

Use the rate and billing treatment approved for that work. Recording a time entry does not itself send an invoice or collect payment. The Task Name describes the logged work; check the Tasks workspace separately for assigned follow-up work.

Review logged work

Narrow the list with From Date, To Date, Team Member, Case, and Activity Type. Review the current filters alongside the hours, amount, and entry counts. An empty filtered list does not establish that no one has logged time. The summary includes Total Hours, Billable Amount, Billable Hours, and a weighted Avg Hourly Rate. Check the individual entries behind a total before using it for billing. Export current page exports the displayed page rather than serving as an instruction to export every entry. Review pagination and filters, then inspect the downloaded file before sharing it. If a saved entry appears incorrect, find the original by case, date, and work description before adding another. Have the billing owner review any correction that affects already billed work.