Document tags describe a file, such as insurance, correspondence, or a police report. They are managed from the file’s actions. To label the case itself, use case tags. Before you start, open Library and find the file you want to label.

Add a tag

  1. Open the file’s three-dot File actions menu.
  2. Select Manage Tags.
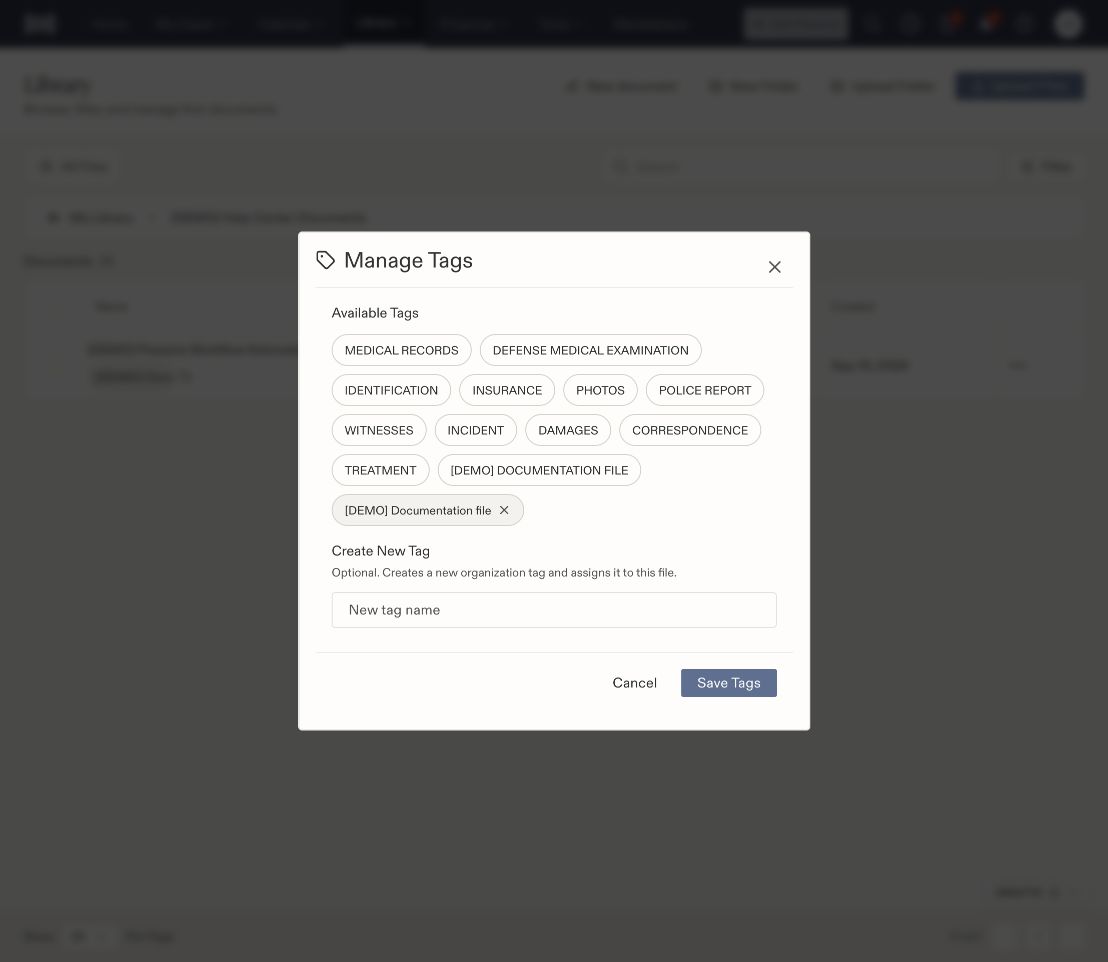
  3. Select the tag under Available Tags. The selected tag appears below the available choices.
  4. Select Save Tags.
  5. Check the file row for the saved tag.
Document Manage Tags dialog with available categories, a selected demo tag, a new-tag field, and Save Tags.

Manage Tags shows available tags and the file's selected tag.

Create a new tag

In Manage Tags, enter a name under Create New Tag, then select Save Tags. This creates an organization tag and assigns it to the file. Reuse an existing label when it already describes the content.

Remove a tag from a file

Open Manage Tags, remove the selected tag using its × control, and select Save Tags. Reopen the dialog to check the saved selection. Removing a selection from this file does not request deletion of the underlying document. If the expected label does not appear, confirm you saved the dialog and are viewing the same file. See Library folders and file actions.