

Understand the three parts
For example, a firm can create a dedicated case type, assign an intake with a conditional mailing-instructions question, and add a Review checklist tab. Each case then has its own answers and checklist state.
Create an isolated case type
- Open Case Types and create the case type with a recognizable name.
- Review its active state, parent selection, and visibility options before saving.
- Use Attorney Only when that is the intended scope. The creation screen describes this option as hiding the type from admin/intake portals.
- Confirm the saved type is available in the attorney intake picker.
Assign a published intake
- Open Custom Intake and create or edit the intended set.
- Organize its questions, required settings, and conditional follow-ups.
- Select Save & Publish and inspect the case-type assignment list.
- Select only the intended types, then publish.
- Check the publication confirmation and return to Case Types to verify the assignment.
Add a custom checklist tab
To add a review checklist, configure a custom subtab and a checklist content section:- Open the intended case type’s matter-layout configuration.
- Add a custom subtab and name it for the work, such as Review checklist.
- Use Quick add → Checklist to add a section.
- Give the section a clear title, such as Intake review.
- Enter concrete items, such as “Review intake answers” and “Confirm follow-up instructions are complete.”
- Select Save Layout and wait for the Matter layout saved confirmation.
- Reopen a case of that type and find the custom tab in its Matter navigation.
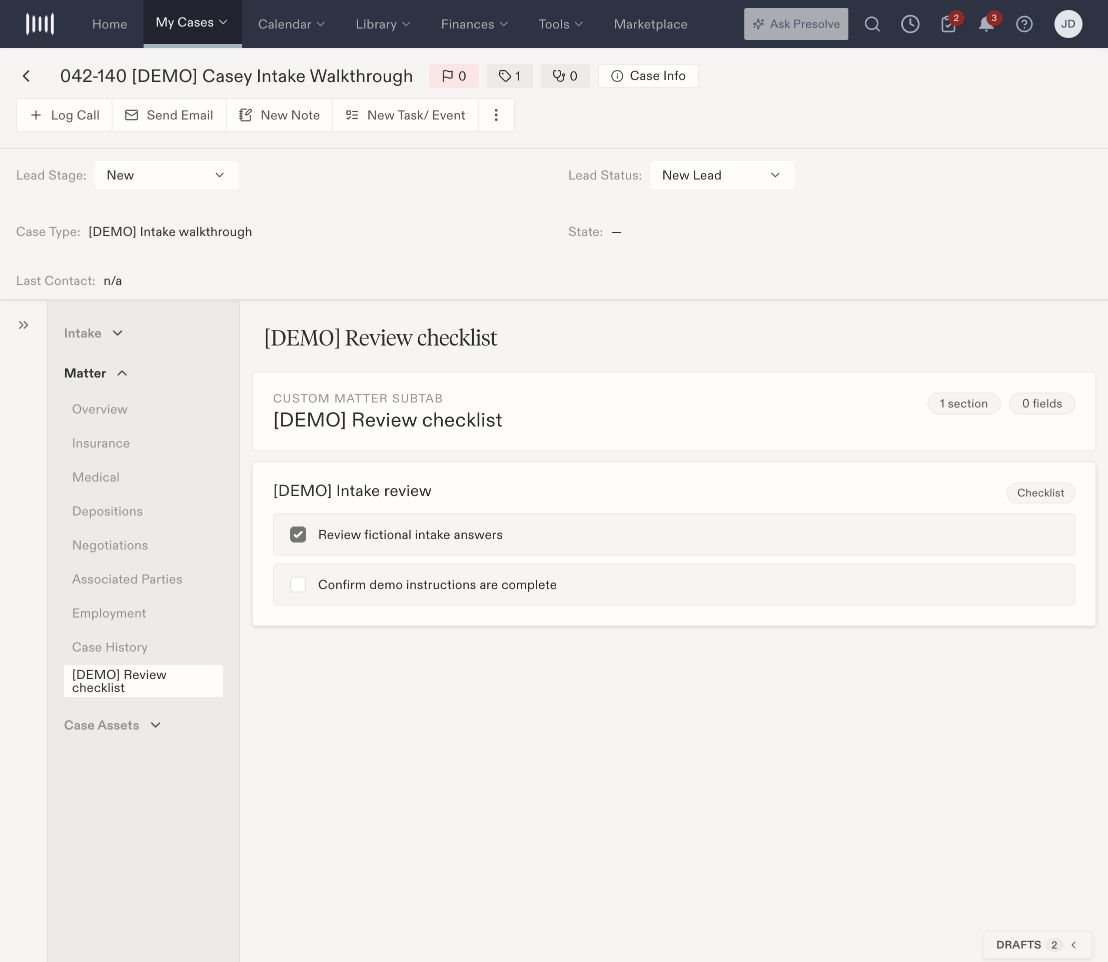
The configured checklist appears on an existing demonstration case, with its own saved selections.
Verify new and existing cases
Use My Cases → Upload Case to check a new case: select the type, confirm the assigned form loads, complete the test answers, and save. Open the resulting matter and inspect both its intake answers and custom navigation. Also reopen an existing case of the configured type. Confirm the new checklist tab appears. Select an item only after completing its work, wait for saving, and reload to verify that case’s selection. Review existing cases after a layout change instead of assuming their content is unchanged. Before removing or restructuring populated fields, review how existing case information should be retained.Resolve a missing form or section
- No intake set configured: inspect the case type’s published intake assignment.
- Custom tab missing: confirm the case type, saved layout, and selected Matter navigation.
- Conditional question missing: check the controlling answer and published intake version.
- Checklist selection not retained: wait for saving to finish, reopen the same case, and check for an error before selecting again.